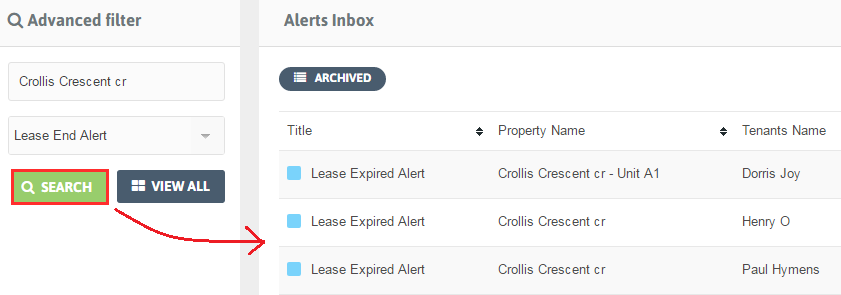
1. Go to Alerts list by clicking ‘See All’ in Alerts tab. To search a particular Alert use our Advance Search option in the left sidebar.
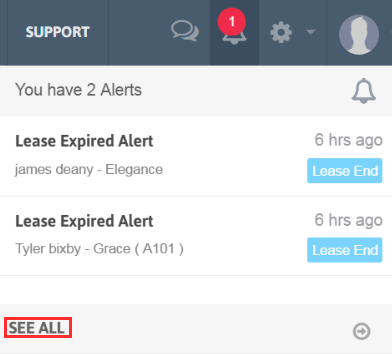
2. Fill the criteria for the search options and then click ‘Search’.
1. Go to Alerts list by clicking ‘See All’ in Alerts tab. To search a particular Alert use our Advance Search option in the left sidebar.
2. Fill the criteria for the search options and then click ‘Search’.
1. The first icon after Support tab on Menu is ‘Email to Tenant’ feature.
2. When you click on it. A pop up window with email details will be opened.
3. Enter your Tenants name and message. You can add multiple Tenants name in it.
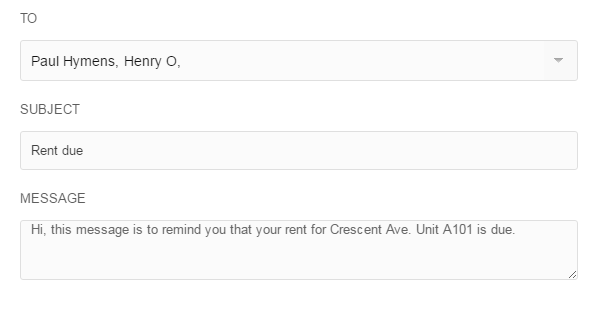
4. Click ‘Send’ and the email will be sent to your tenants.
Add Feedback:
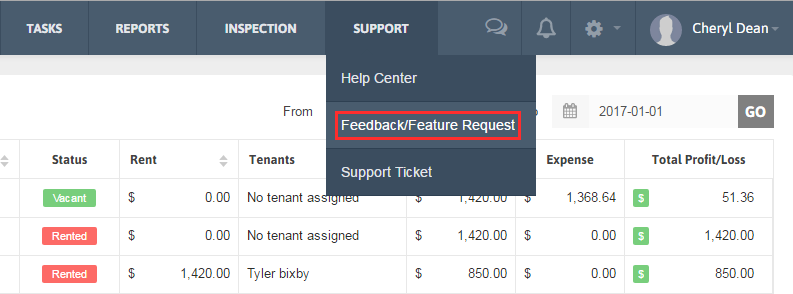
1. Click Support → Feedback from the Menu.

2. Click ‘Submit Feedback’.
3. Fill the details of the Feedback.
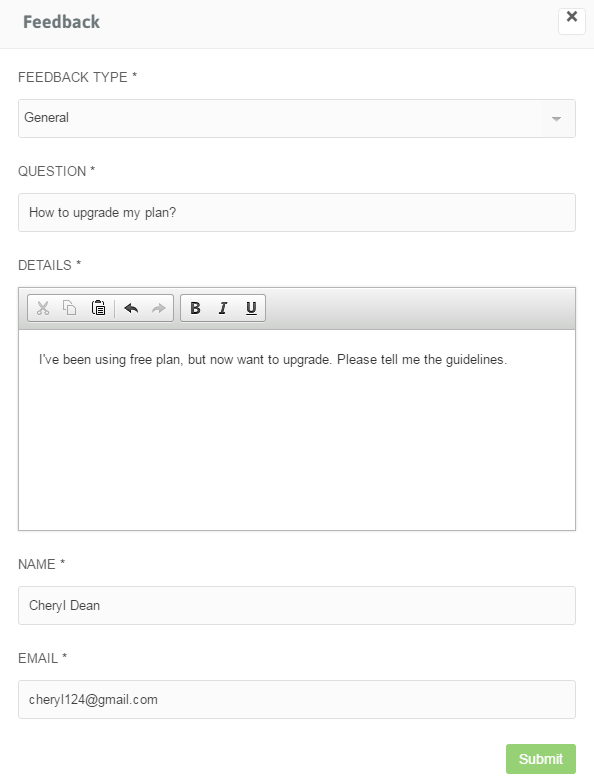
4. Click ‘Submit’ button.
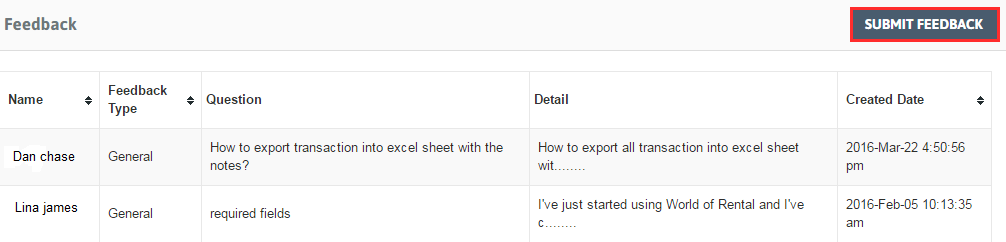
View Feedbacks:
1. Click Support → Feedback from the Menu.
2. There you can see the Feedbacks submitted by other World of Rental users.
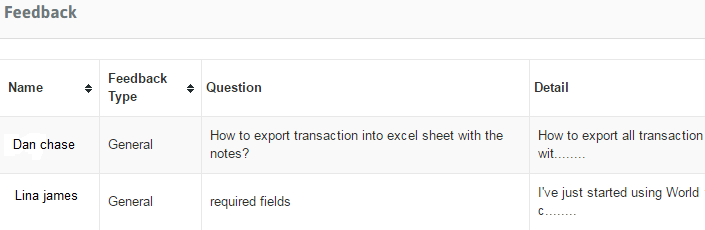
3. Also if you like any feedback and you wish that feature request to be included too then you can Vote for that feedback too.
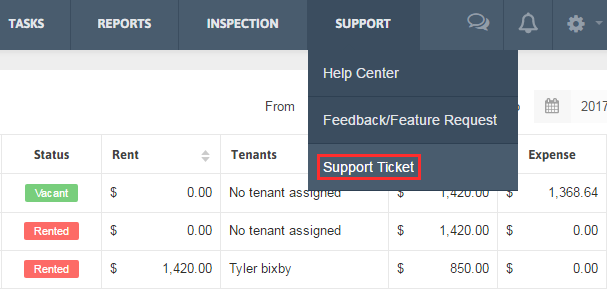
Create Ticket:
1. Click Support → Support Ticket from the Menu.

2. Click Create Ticket. Fill the details of the Ticket.

3. Be as specific as you can for the issue you’re facing for us to assist you better.

4. Click ‘Create Ticket’ and we’ll recieve the detailed info about your issue or difficulty.
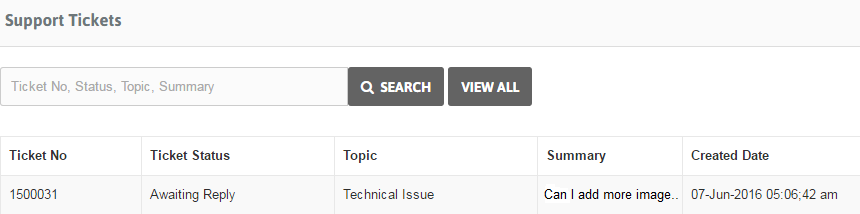
View Tickets:
1. Click Support → Support Ticket from the Menu.
2. A table with Support Ticket list will be shown along with Ticket No., Ticket Status, Topic, Summary and Created Date. You can also sort the data in ascending or descending manner by clicking on the column name.
Filter Tickets:
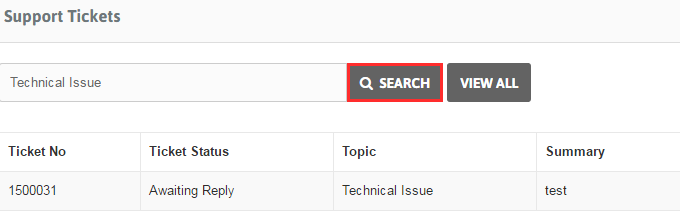
1. Click Support → Support Ticket from the Menu.

2. To search your desired Ticket just type Ticket No., Name, Email, Topic and/or Summary in search bar. And then click ‘Search’.
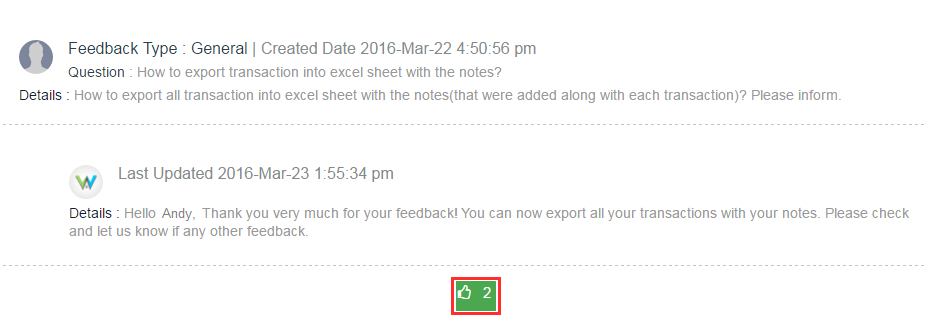
Post a reply:
1. Click Support → Support Ticket from the Menu.

2. Choose the ticket for which you want to post a reply and click on the ticket.
3. A detail page of that ticket will be opened. Click on Update Reply.
4. Write the reply and click Post Reply.
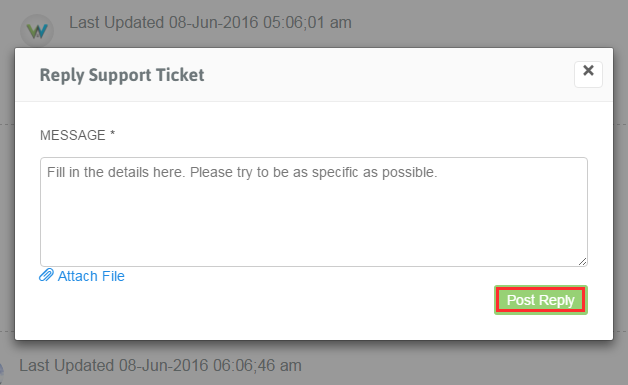
5. Your reply will be displayed in the summary.
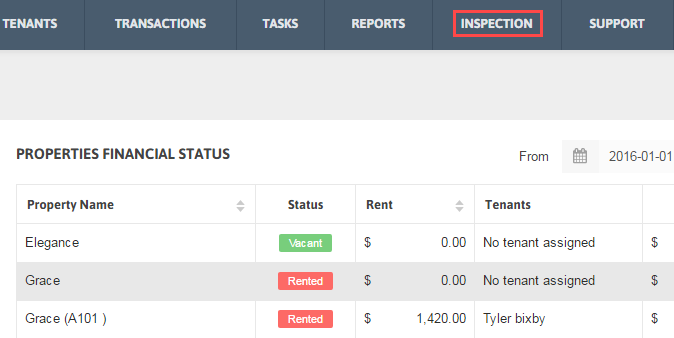
1. Click Inspection from the Menu.
2. Click Add New.

3. Fill the required Inspection Details.

4. You can also add Inspection images for your record. For that click on Images from Left sidebar. Click ‘Browse’ to choose an image from your computer. To add multiple images click [+]. (Image formats gif, jpg, png are allowed to be uploaded.)

5. Don’t forget to ‘Save’ the inspection details.
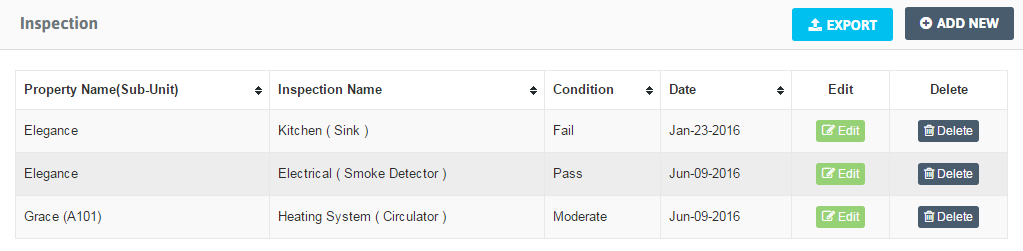
1. Click Inspection from the Menu.

2. A table with Inspection list will be shown along with Inspection Image, Property Name, Inspection Name, Condition and Date. You can also sort the data ascending and descending by clicking on the stated cloumn names.
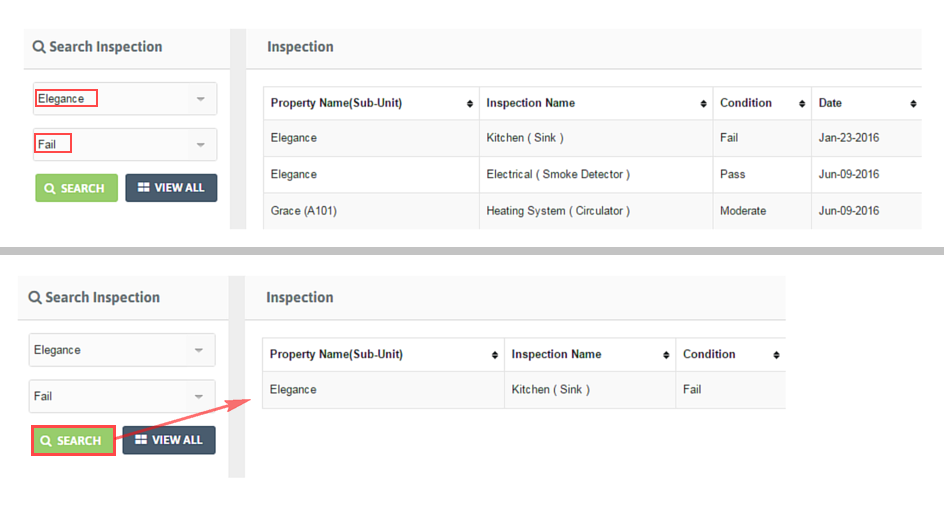
1. Click Inspection from the Menu.

2. To search your desired Inspection select Property Name and/or Property’s Condition from the left sidebar and click ‘Search’.
1. Click Inspection from the Menu.

2. To export all your Inspections with its details, click ‘Export’ button.
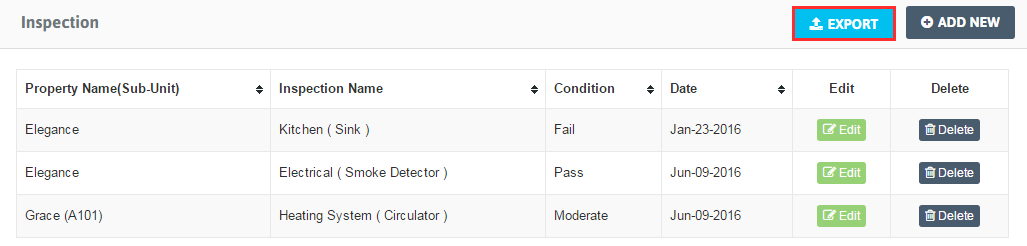
3. You can also Export particular Inspection after filtering them.
Edit Inspection:
1. Click Inspection from the Menu.

2. Choose the Inspection you want to edit, click on ‘Edit’ button.
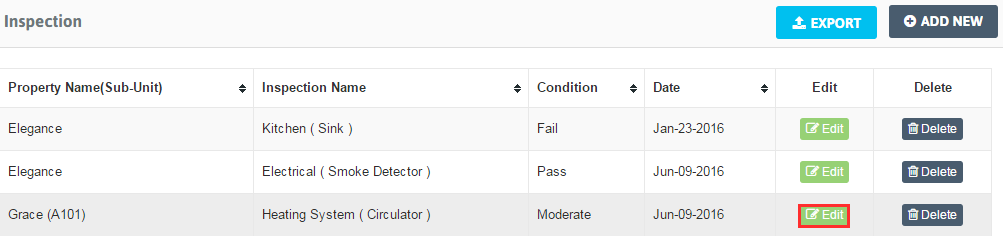
3. Modify the data you want. Click ‘Save’ button.
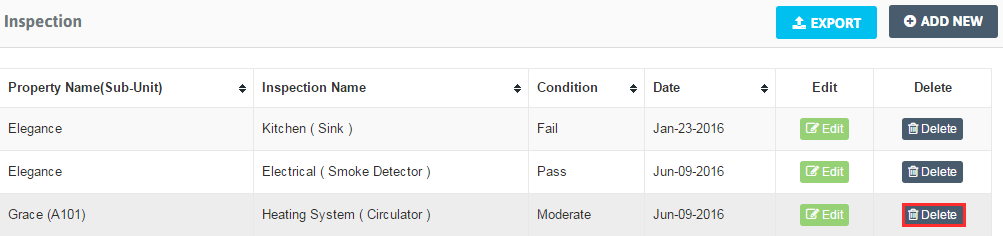
Delete Inspection: 1. Click Inspection from the Menu.
2. Click Delete for all or any Inspection you want to remove from the inspection list and click ‘Save’.
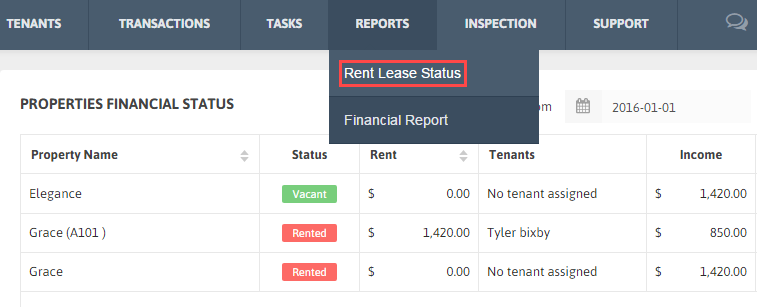
View the Rent lease status report:
1. Click Report → Rent Lease Status from the Menu.

2. A table will be shown with Tenant Name, Property Name, Rent and Lease Period. You can also click on particular Tenant and Property name to get their details.

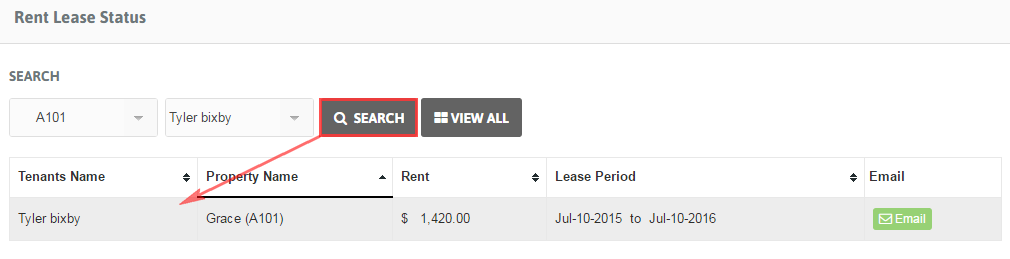
Filter the Reports:
1. Click Report → Rent Lease Status from the Menu.
2. Filter the reports for lease status by selecting Property and Tenant name. Click Search to get the results.
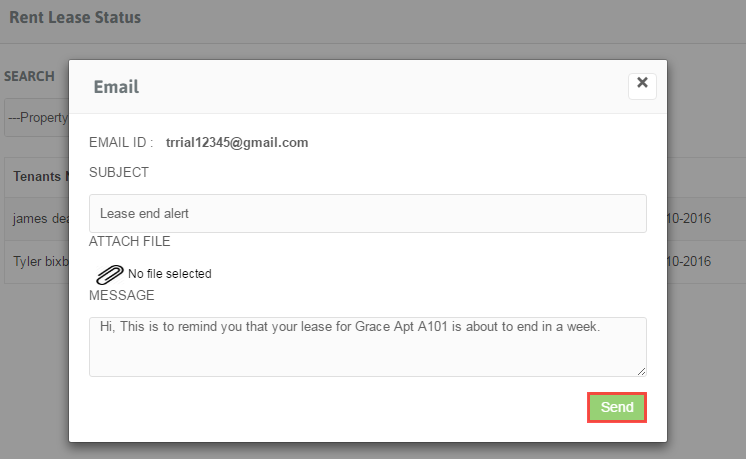
E-mail Lease Ending Reports to the Tenant:
1. Click Report → Rent Lease Status from the Menu.

2. A table shows the Rent Lease Status Report with its details.
3. Click Email under Email column.

4. Email details will be shown in popup. Click ‘Send’ and the email with the Lease status report will be sent to the Tenant.